Finished sequence
A character should sound recognizable across an episode, even when their delivery changes. They might whisper in one shot and shout in the next, but their accent, vocal texture, and underlying identity should still feel connected.
While making shows in Fringe, I found that different video models responded better to different approaches. With Seedance, I could often establish the voice through a detailed profile and reinforce it with an existing shot. With MiniMax, I got more precise results by creating a dedicated voice test and extracting a short audio reference that I’d attach as an audio asset.
Here’s how I use both approaches.
Establish the character’s voice profile
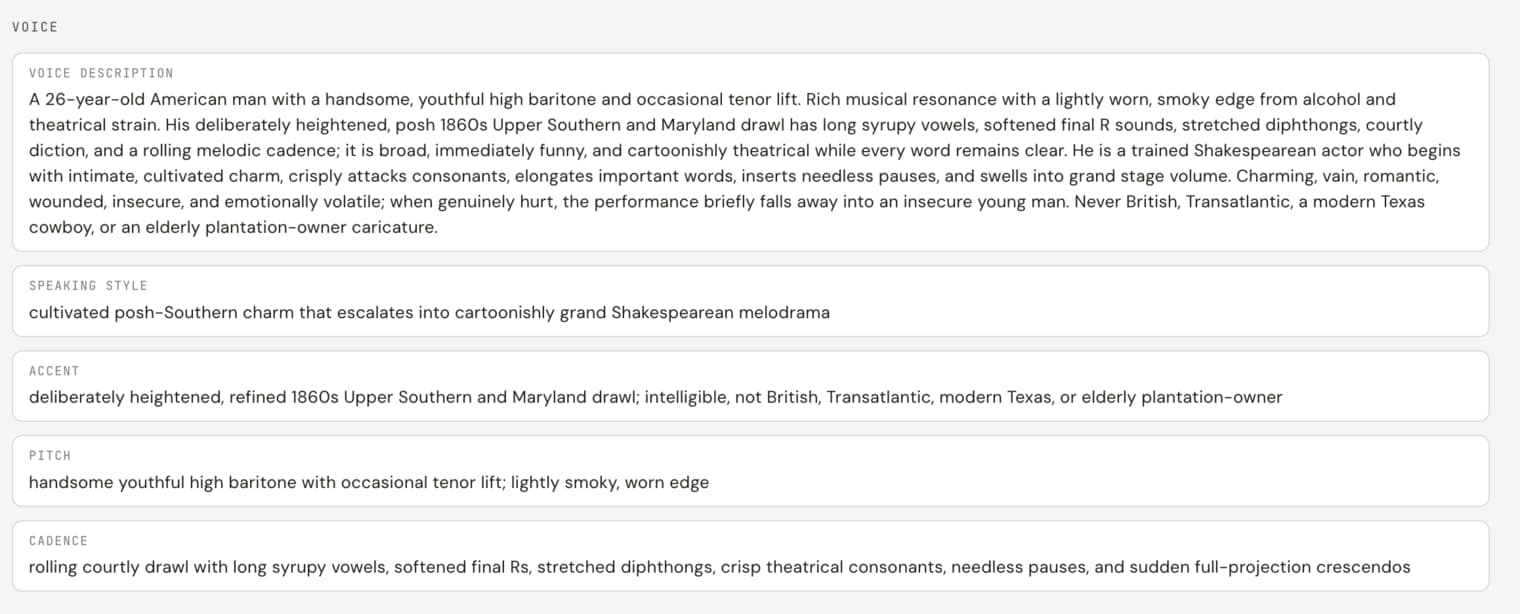
Each character in Fringe has a section for their voice profile. I use it to describe the qualities that make their voice recognizable: accent, pitch, texture, and cadence.
For John Wilkes Booth in my show, Trust Fund Time Machine, that included a youthful baritone, a heightened period-accurate Southern/Maryland drawl, and theatrical speech.
The agent carries those qualities into generation prompts through a voice lock—written instructions describing how the character should sound.
This is the foundation for both workflows. The difference is how I reinforce it for the video model I’m using.
Seedance: start with the profile, then reinforce it with a successful shot
With Seedance 2.0 and 2.5, I found that voices tended to remain fairly consistent when the same voice profile and voice-lock instructions were used across shots.
That made the written profile a useful starting point. I could describe the voice to the agent, generate a shot, and listen for whether the character sounded right.
However, even the voice profile can drift at times across generations. For additional consistency, I started using an existing shot with a successful vocal performance as a reference for subsequent generations.
The important instruction was what to take from that video. I wanted its voice identity carried forward, while the new shot followed its own dialogue, action, and composition.
An example request in Fringe is:
Use this shot as the reference for the character’s voice. Carry over the vocal identity, accent, and texture. Use only the new shot’s dialogue, and don’t take its visuals or background audio from the reference.
The agent includes that distinction in the generation prompt.
Why I used this approach: the saved profile was already giving me useful consistency on these models. Referencing a successful shot gave the next generation an audible example of the voice I wanted, without needing to create a separate audio asset first.
MiniMax: find the voice in a separate test, then use an audio reference
With MiniMax H3 Max, I found more success establishing a specific voice through a dedicated test.
I asked Fringe’s agent to create a five-second dialogue clip for the character. It’s a test generation, separate from the episode’s actual shots, so I can focus on getting the voice right.
An example request is:
Create a five-second dialogue test using this character’s voice profile and character sheet. Keep it separate from the episode’s shots so we can refine the voice first.
I listen and give specific notes: change the accent, make the voice more nasally, make the voice deeper, or adjust the cadence.
Once I have a performance I like, I download that clip and extract out the audio on CapCut and reupload it to Fringe as a WAV file (works better than MP3 as WAV audio is lossless and uncompressed). I have to do this externally because Fringe currently doesn’t have an audio extraction feature, but we will be adding it soon to make this easier. Avoid attaching videos as reference for the voice assets as it makes your H3 generation even more expensive unnecessarily.
That audio then becomes the voice reference for the character’s shots once you inform the agent to use it as the voice asset for that specific character in shots where that character has dialogue. The prompt still includes a written voice lock based on the selected voice.
Why I used this approach: it gave me a more precise vocal target in my H3 generations. I could settle the character’s voice independently of a scene, then use a focused audio sample to reinforce it each time.
Keep the MiniMax audio reference short
The test clip and the final reference don’t need to be the same length.
I generate a five-second test, but generally use two to three seconds of clear speech for the extracted reference. That has been my preferred range.
I don’t usually go beyond five seconds. In my testing, longer references could introduce more drift, gibberish, or dialogue carried over from the reference itself.
I ask the agent to make the reference’s role explicit:
Use this audio for the character’s voice identity, accent, and texture. Keep the saved voice lock in the prompt. The character should speak only the dialogue written for this shot.
Before generating, I check that the proposal includes the intended audio reference and the voice instructions.
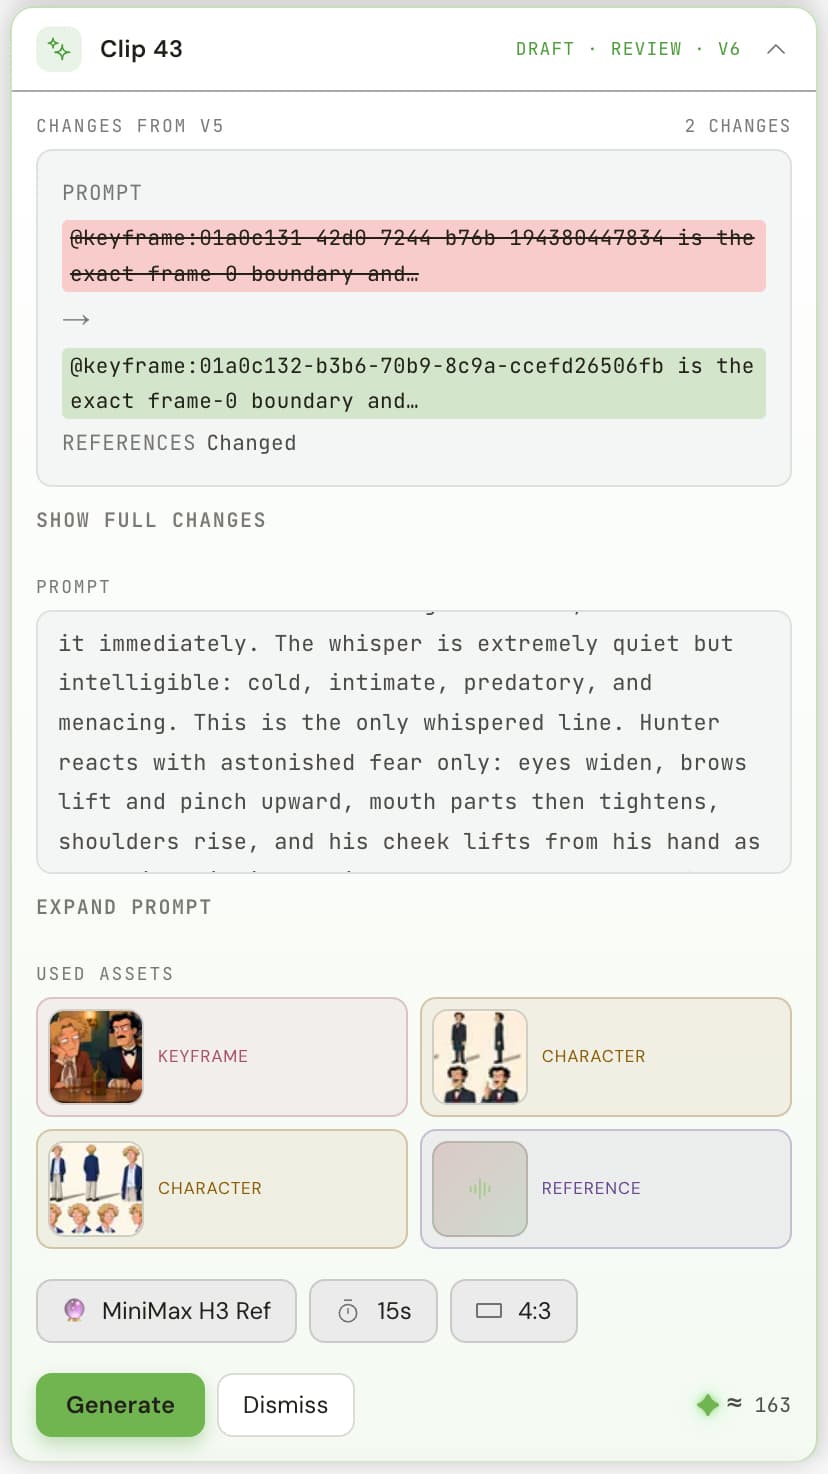
This became my most reliable approach for MiniMax, though I still review each take rather than assume the reference guarantees a match.
Direct the performance for each shot
Both workflows aim to preserve vocal identity while allowing different performances.
In the saloon scene, Booth needed to begin with a menacing whisper, then become increasingly loud, passionate, and angry. I directed those changes through the agent while retaining the established voice.
A useful note identifies the performance change precisely: only the first line is whispered; the next line starts at full projection; each following phrase becomes more forceful.
Listen to the resulting shots together. Check whether you hear the same character expressing different emotions, or an unintended change in the voice itself.
Finish the sound in the edit
Voice identity is only part of the finished result. I also find that generated dialogue can have a robotic quality, and loudness can vary between clips.
In my CapCut editing workflow, I use reverb adjustments to help the voices sound less robotic and normalize loudness across clips. Those are finishing steps after I’m satisfied with the generated voice and performance.
For Seedance, my starting point is the saved profile, reinforced with a successful video reference when needed. For MiniMax, it’s a dedicated voice test followed by a short audio reference. Fringe’s agent handles carrying those choices into the shot, while I keep directing how the character should perform.