Finished sequence
This scene is from the pilot of Trust Fund Time Machine, my adult animated comedy made with Fringe. Hunter and John Wilkes Booth are drinking at a saloon table when a Union soldier confronts them. The sequence cuts from their conversation, to the soldier across the table, to a close confrontation as Booth moves into his space.
Each angle needed to feel like another view of the same unfolding scene. Building the sequence around keyframes helped me achieve that.
Consistency is not continuity
A character can look exactly right in two shots while the cut between them makes no sense.
For this guide, consistency means keeping the character designs, wardrobe, props, and visual style recognizable. Reference models have made that much easier in AI production workflows.
Continuity means preserving the scene’s relationships as the action moves forward: where people are sitting, who they’re facing, where objects belong, and whether the next shot follows naturally from the previous one.
If you’ve generated two individually convincing shots that don’t fit together, you’ve encountered this distinction, and you probably know exactly how annoying this can be. Maintaining continuity across shots remains one of the biggest challenges in making complete scenes with AI video.
Character and setting references provide the elements of a shot, but they don’t necessarily communicate the exact arrangement established in the last shot. A prompt can describe that arrangement, yet leave room for a different interpretation.
Fringe already keeps the show’s assets and shot details together. This workflow adds a specific visual reference for how those elements should be arranged in each shot.
Establish the first shot in a keyframe
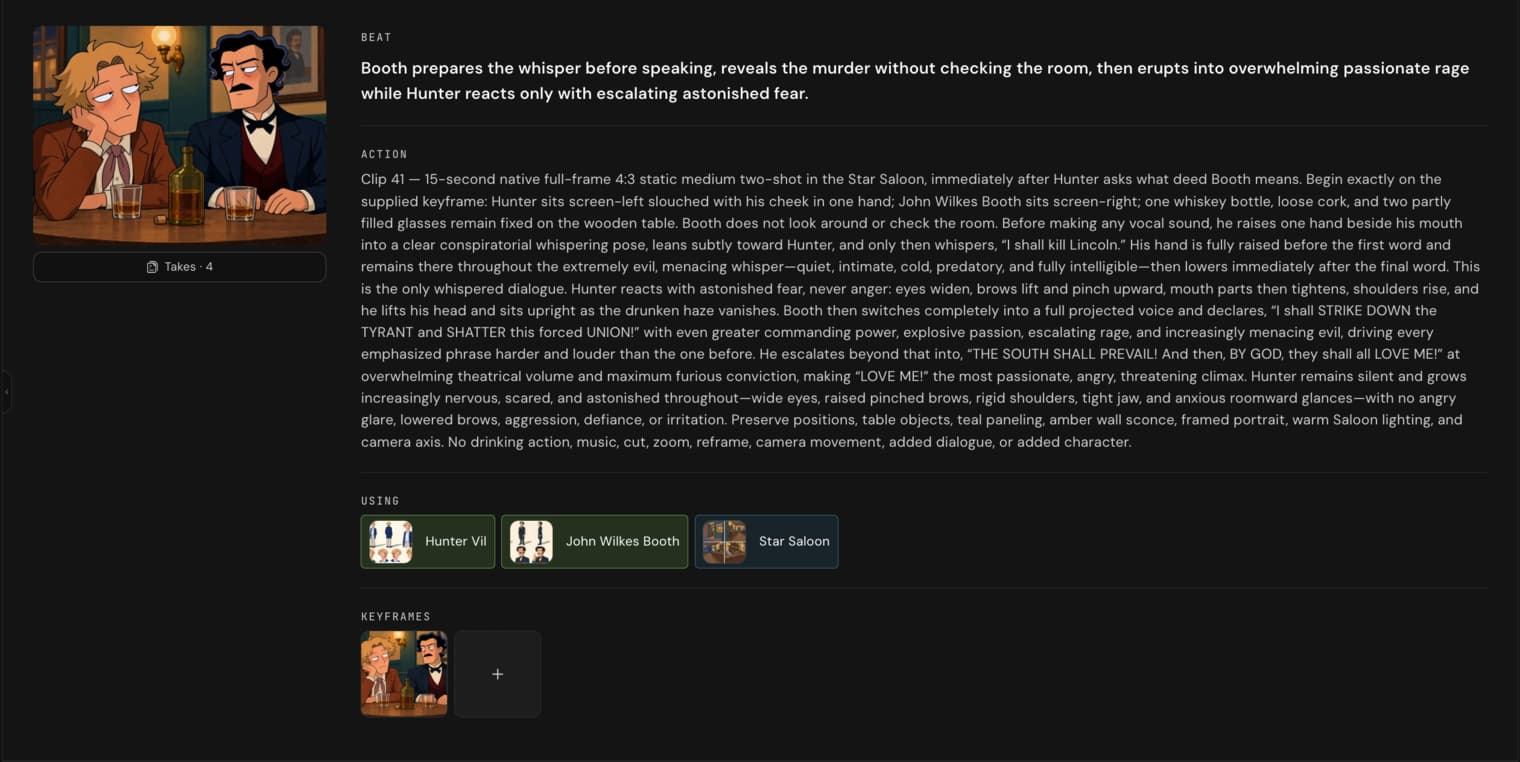
For this show’s animation style, I wanted mostly static compositions, with cuts between angles as the conversation developed. Continuous camera movements weren’t always producing the presentation I wanted.
I’d also tried continuing from a previous video using it as a video reference. That could carry the action forward, but I found subsequent generations end up with a fuzzy and degraded look that no upscaler was able to fix.
Building each shot around a keyframe gave me a composition to review before generating the video. Here, a keyframe is the still image I use to establish how the shot should begin.
In Fringe, ask the agent to create that image using your character and setting references. Describe the framing and where characters are positioned within the scene.
My first frame establishes Hunter and Booth seated beside each other, with the bottle and glasses on the table. I used Hunter and Booth’s character sheets, the setting, and the drinking props as references for this frame. Before moving on, I can inspect their placement, expressions, and surroundings, then ask for specific changes.
Once the image is ready, I tell the agent:
Make sure this keyframe is used as the exact starting frame for the shot. Don’t change the camera angle or what’s in the frame.
I used MiniMax H3 Reference for this entire episode. This instruction makes the intended use of the image explicit while I still review the generated take to check how closely it follows the frame.
Change the angle while preserving the scene

For the second shot, I wanted an over-the-shoulder angle, looking past Hunter and Booth from behind toward the soldier standing across the table.
I used the previous starting keyframe as the scene reference and included character references to help preserve their designs from the new viewpoint.
In Fringe, you can describe that request directly:
Use the previous starting keyframe as a reference. Create an over-the-shoulder shot from behind Hunter and John Wilkes Booth, showing the Union soldier standing in front of them across the table. Include their character references to keep the designs consistent.
The existing frame gives the next composition a visual connection to the scene. Your direction identifies what changes: the camera’s viewpoint.
For dialogue where the characters remain in place, this lets you build different angles from an established setup.
Use the ending frame when the action changes
During the soldier’s shot, he leans forward and plants his fists on the table. To carry that pose into the next angle, I used the ending frame of the generated video.
You can ask Fringe’s agent to extract the ending frame from the relevant shot or take, then use it as the reference for a new keyframe.
For this one, I wanted a side close-up: the soldier on the right, facing left, with open space for Booth to enter and meet his eyeline.
The choice of reference follows a simple principle:
- If the characters’ positions haven’t changed, an established starting keyframe can provide the reference for another angle.
- If the action has changed their positions or poses, use the ending frame that shows what the next shot needs to continue from.
That decision is central to the workflow. The reference should reflect the state of the scene you want to carry forward.
Refine the composition before animating it
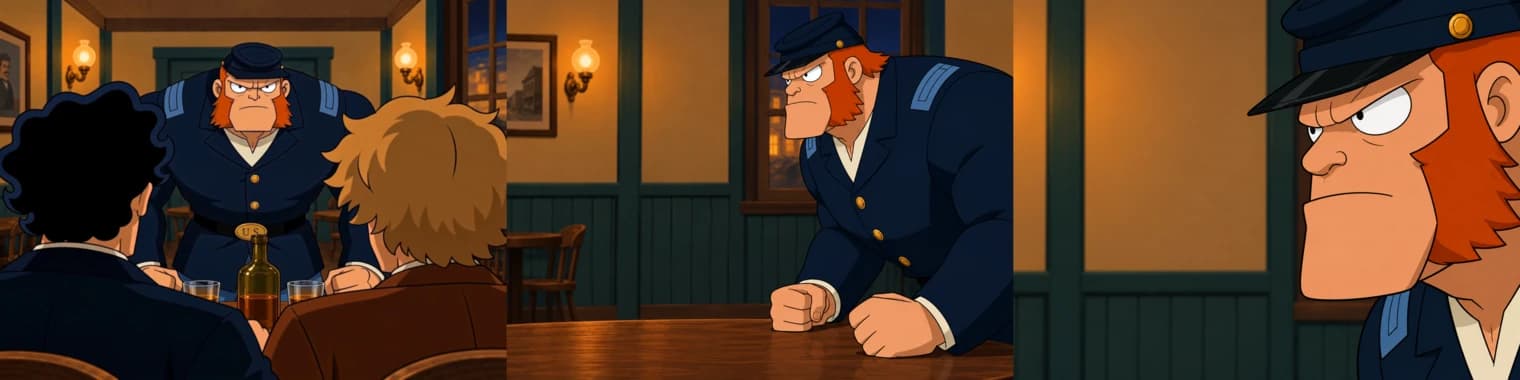
The first version of the side angle preserved the soldier’s forward lean and fists on the table. It also left space on the left, as requested. But it included too much of his torso and the room, which is a result of how I described it to the agent.
I followed up with:
It has to be much more of a closeup where their faces will fill both halves of the screen.
That clarified the shot size. Keyframes also help me visualize whether the framing conveyed the relationship between the characters before I animated them. In the tight side close-up, the soldier’s face dominates the right half of the frame, with space on the left for Booth to step directly into his eyeline. The soldier’s intimidation and Booth’s drunken defiance become part of the visual story.
This is where specificity helps: describe who occupies each part of the frame, how much of them should be visible, and what space the coming action requires.
Once the keyframe works, ask Fringe to prepare the video shot using that image, character and voice assets, and your performance direction. Review the proposed prompt and references, request any corrections, then tell the agent to generate.
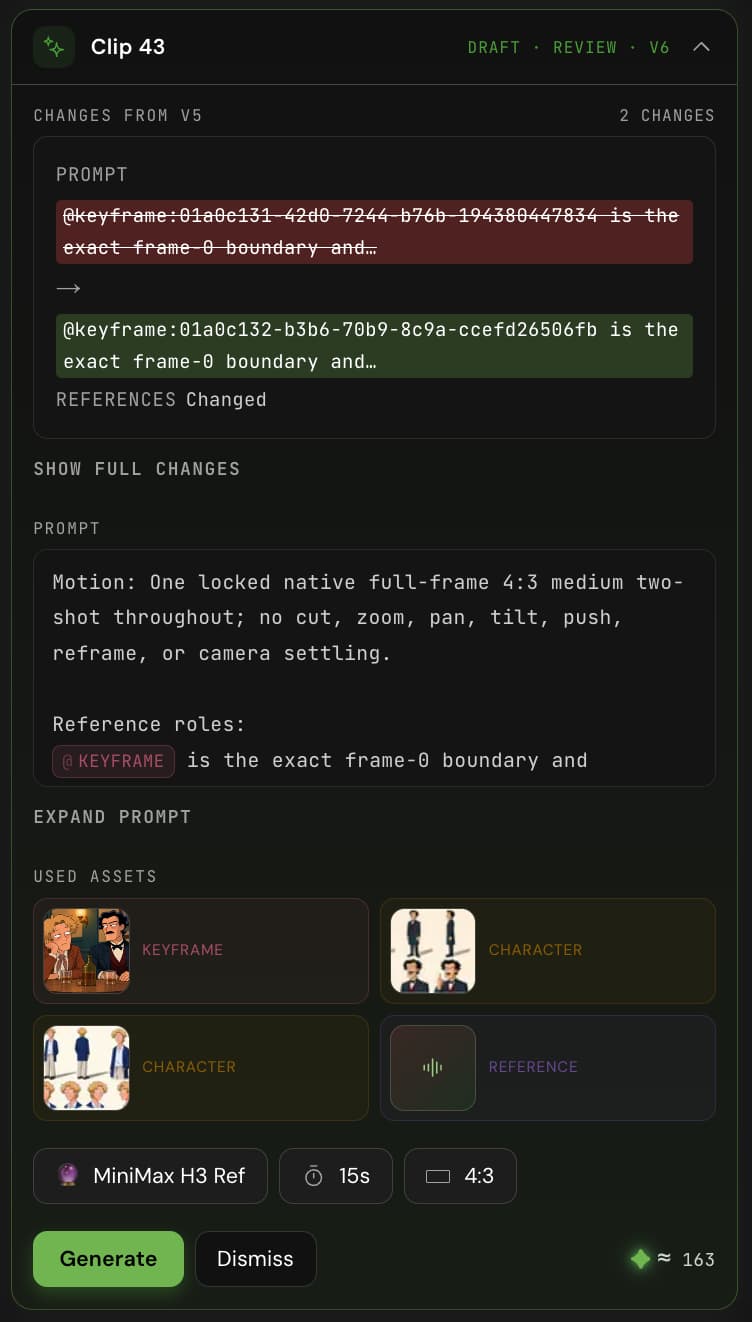
You can continue refining the performance afterward. In the earlier two-shot, I asked for Booth’s whispering hand to rise before he spoke and for Hunter to look frightened and astonished rather than angry, while preserving the staging.
Apply it to your own sequence
This approach worked particularly well for my show’s animation style and its use of held shots with cuts between angles. It can be useful in other styles, too, wherever you want to establish a composition before generating the action.
It isn’t a complete solution to continuity, and a starting keyframe won’t prevent every change during a video. You’ll still need to review the shots together.
Try it yourself on Fringe with a short scene. Establish one frame, build a second angle from it, and switch to an ending-frame reference when the action calls for it. Check the characters’ spatial relationships, eyelines, and important props across the cut.
For Trust Fund Time Machine, this gave me more control over one of the hardest parts of AI animation: making separate generations feel like one continuous scene.